Apple iPad with iOS 7 (POP3 & SMTP over SSL)
To configure iPad to receive and send email using our servers over POP3 and SMTP over SSL, you can follow the steps below. In this manual we are using example domain name and email address, so please make sure to replace:
 | [email protected] with your email address domain-name-example.com with your domain name your_server.com with your server's host name (you can find your server's host name listed in the upper left corner of your Control Panel) |
1. On your iPad's home screen, tap Settings.
2. Tap Mail, Contacts, Calendars, then tap Add Account.
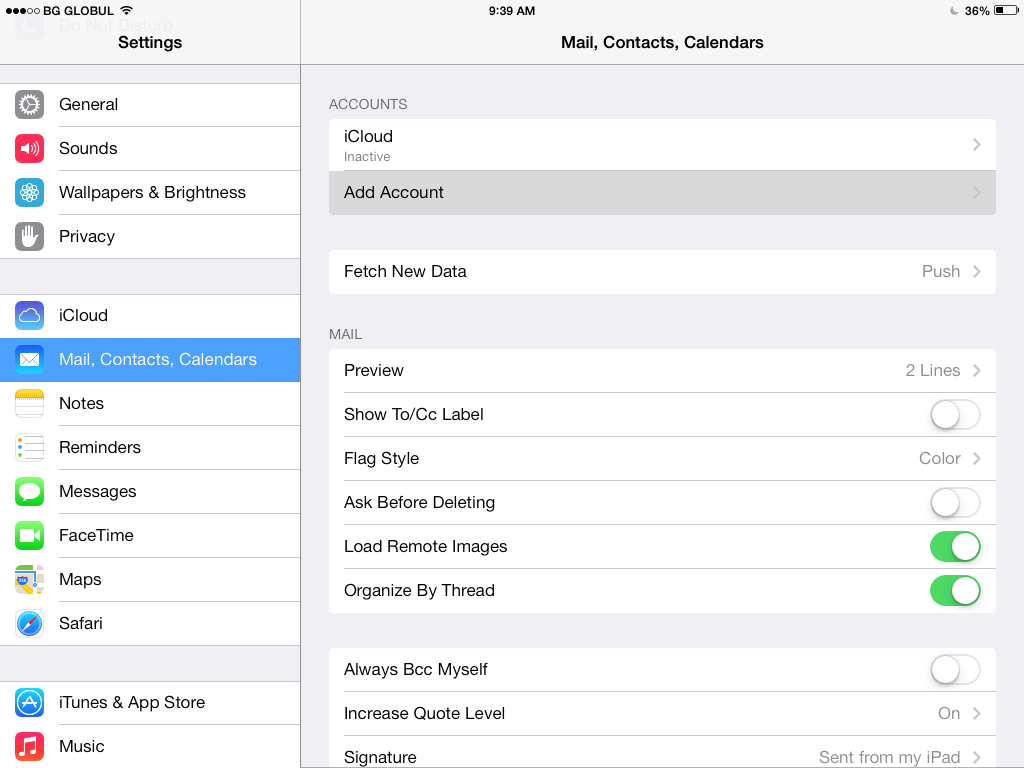
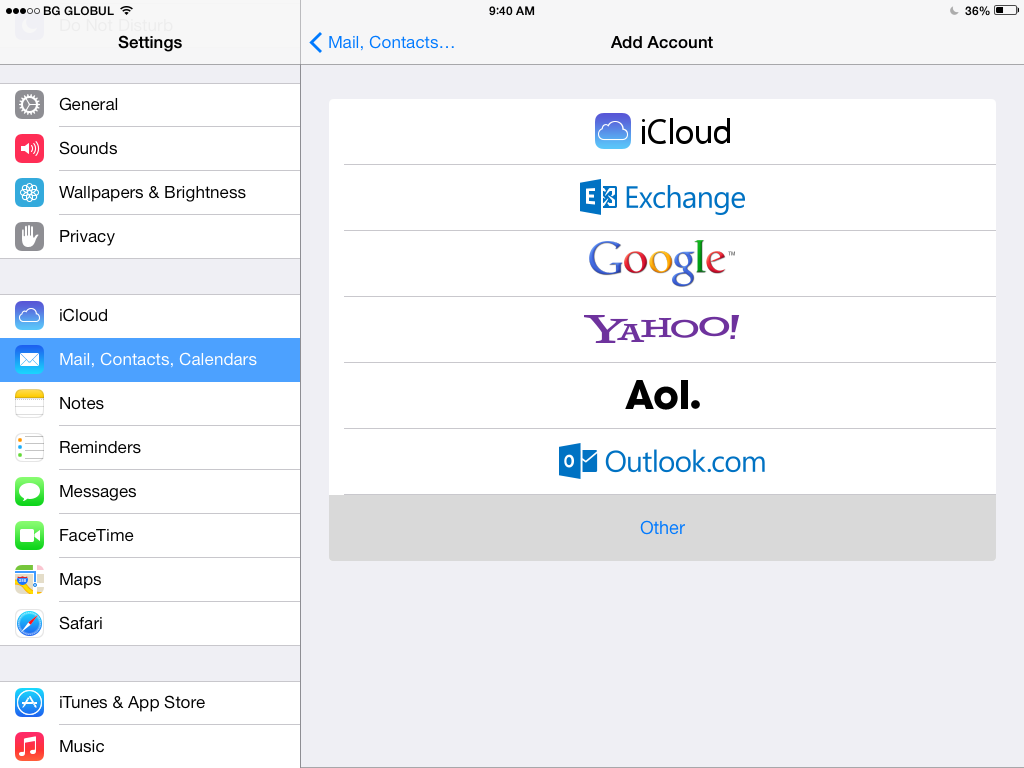
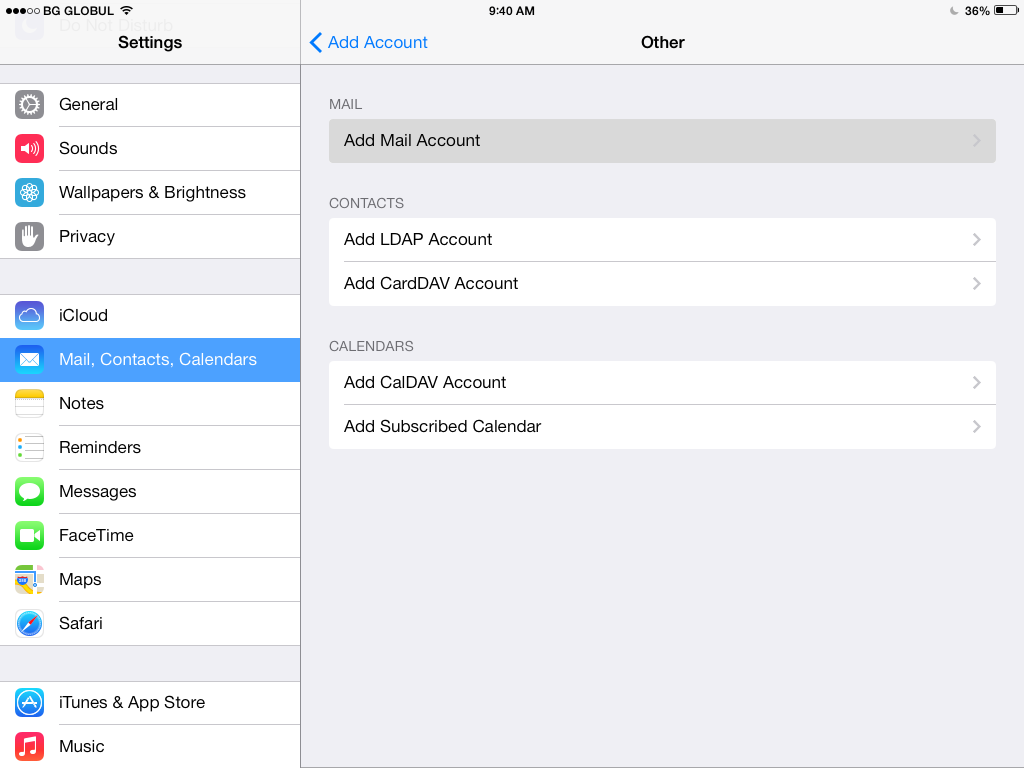
3. Tap Other, then tap Add Mail Account.
4. In the Name field you should enter the name that would appear on the messages you send.
Enter [email protected] in the Email field.
In the Password field you need to enter the current password for this particular mailbox.
In the Description field you need to add a short description of your account in your e-mail client. This name would show up only in your own mail program. You can set a name such as "Work Account", "Sales mail" or your name, for example.
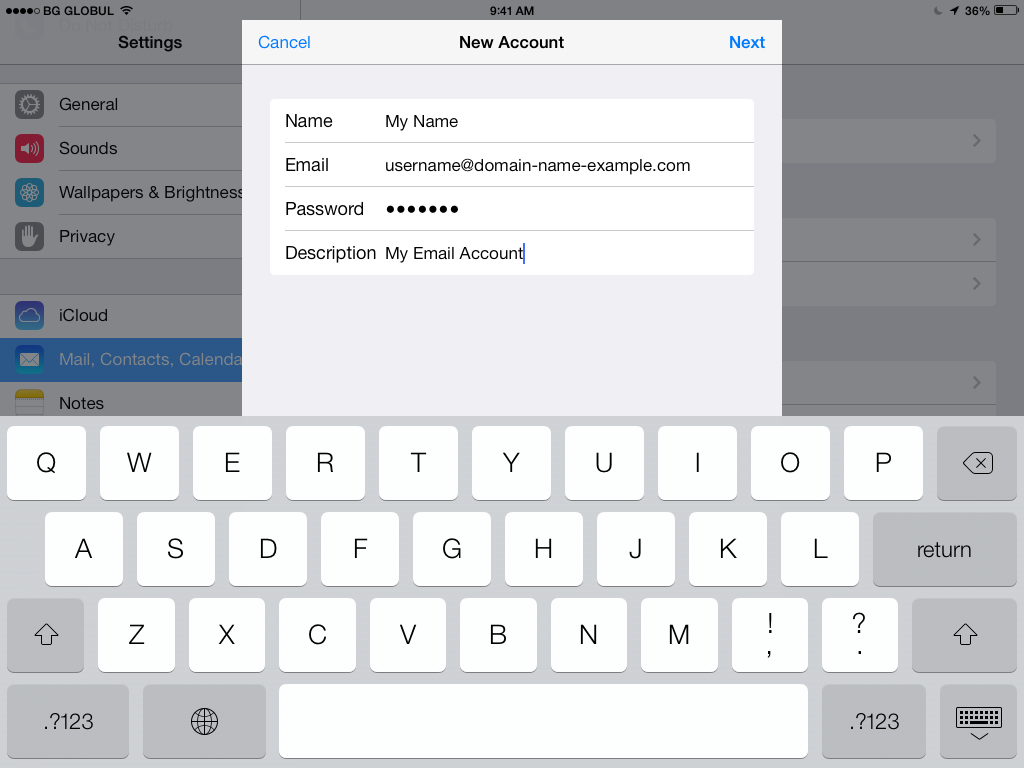
Tap the Next button.
5. Tap POP.
For Host Name in the Incoming Mail Server section use mail.your_server.com (replace your_server.com with your server's name).
Enter [email protected] in the User name field (replace [email protected] with your email address).
The Password field should be filled in for you from the previous screen.
For Host Name in the Outgoing Mail Server section use mail.your_server.com (replace your_server.com with your server's name).
Enter [email protected] in the User Name field (replace [email protected] with your email address).
In the Password field enter the current password for this particular mailbox.
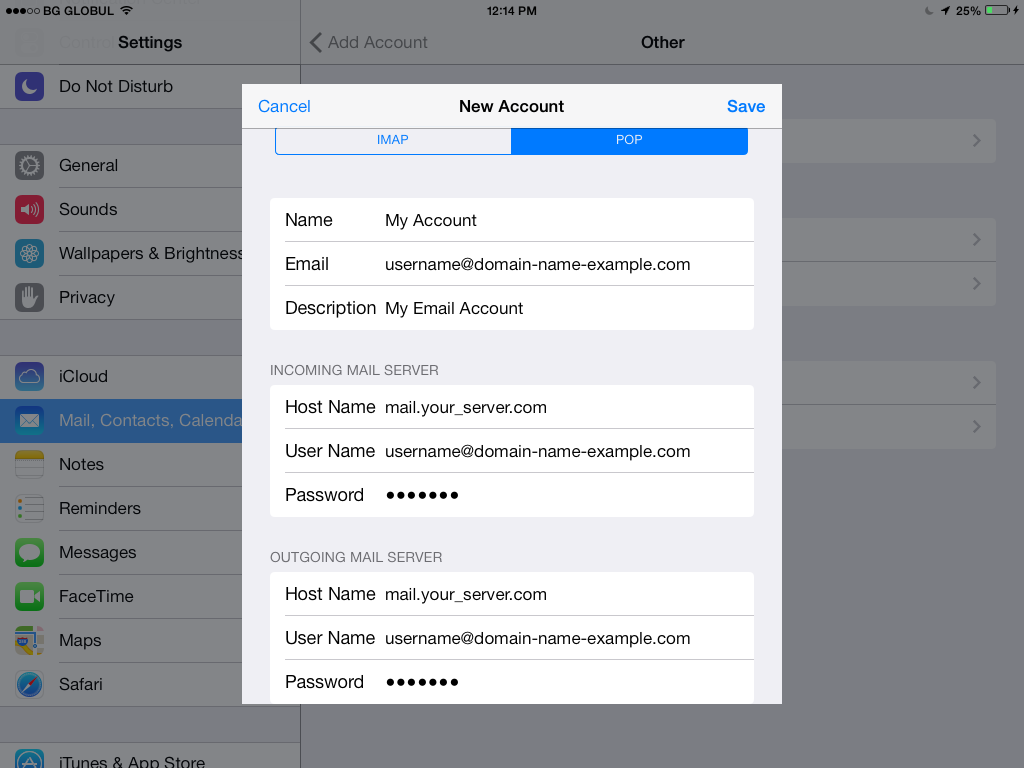
Tap the Save button at the top of the screen.
6. Mail will verify your settings by connecting to the server. You will need to have an active Internet connection for that.
7. Tap your account under Accounts.
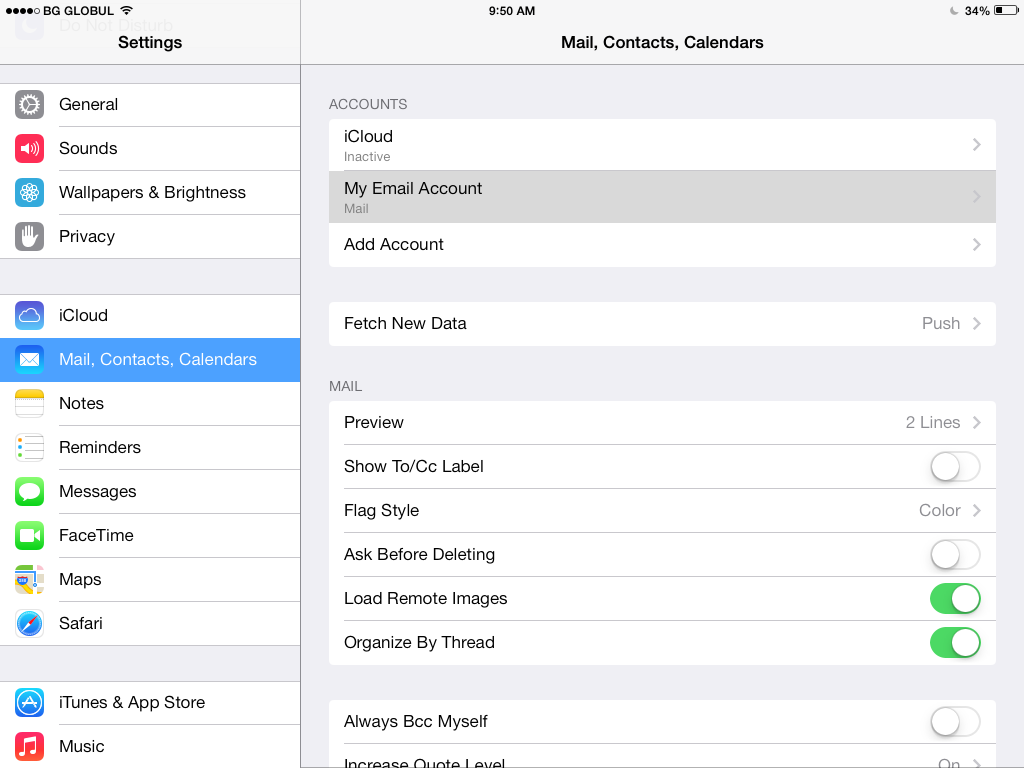
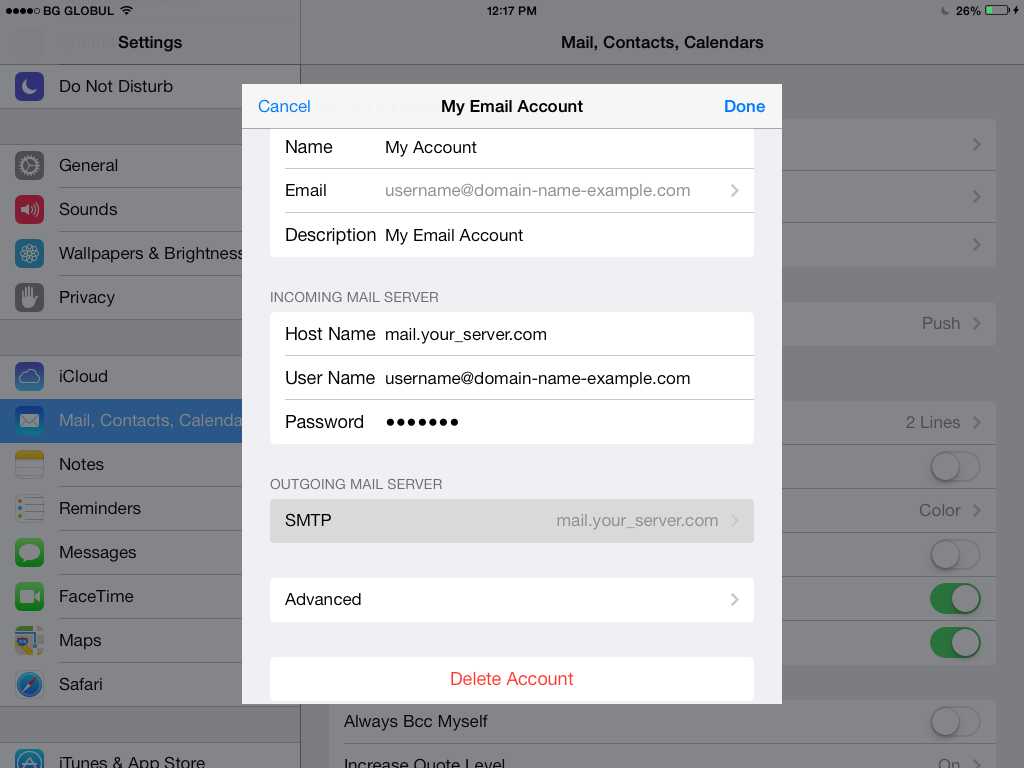
8. Scroll to the Outgoing Mail Server section.
9. Tap on the SMTP setting.
10. Under Primary Server tap mail.your_server.com.
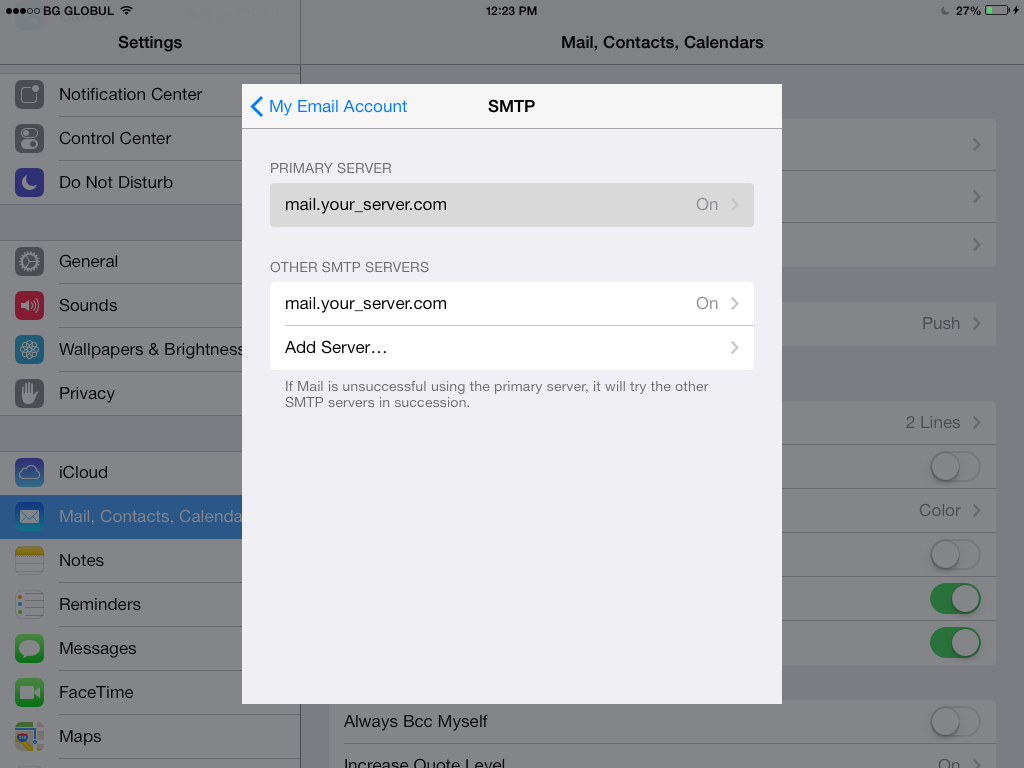
11. Make sure that Use SSL is set to ON and that Server Port is set to 587.
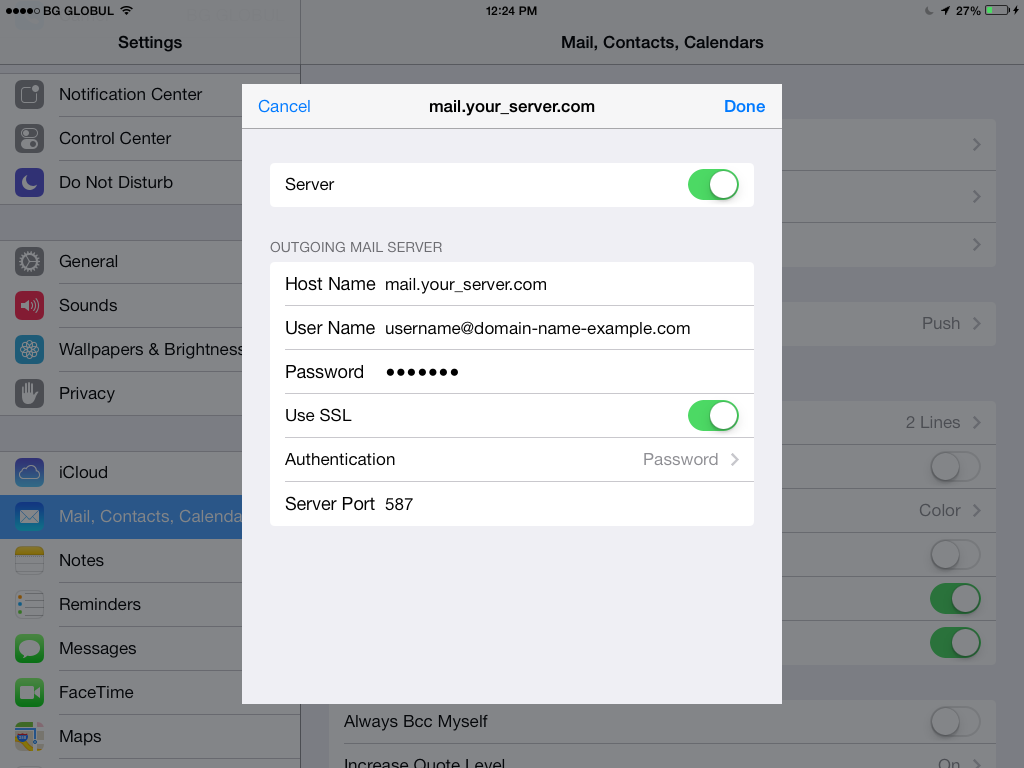
Tap on the Done button.
Tap on the back arrow button at the top of the page.
12. Tap Advanced.
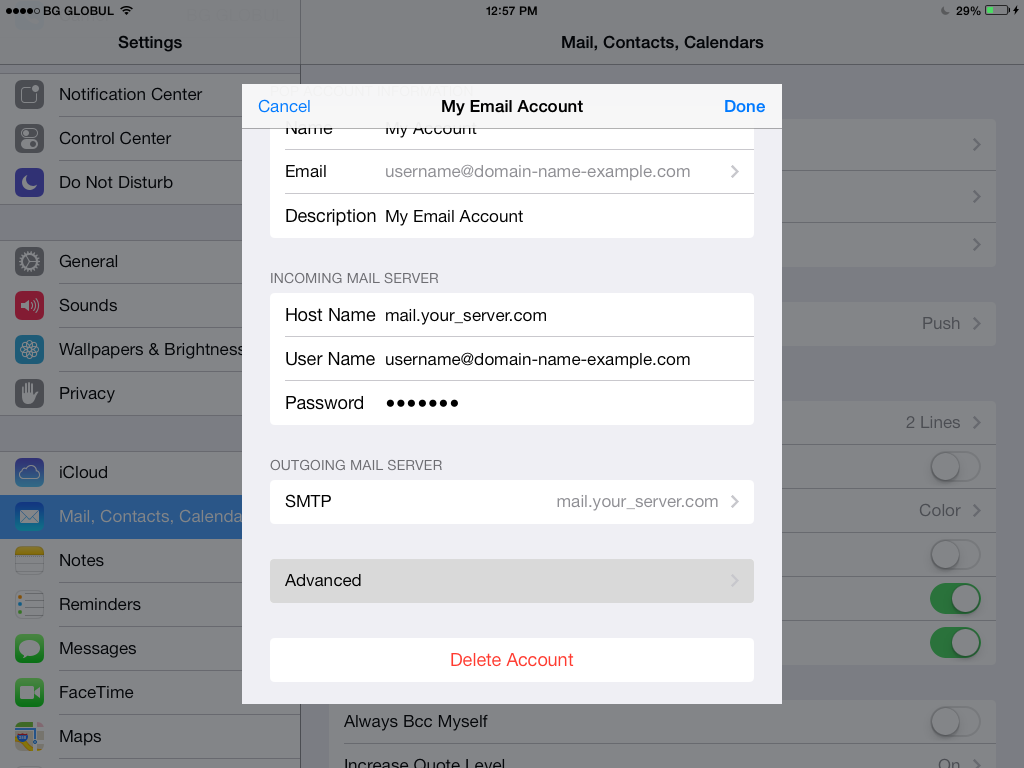
13. Make sure that Use SSL is set to ON, and that the Server Port is 995, then go back to the previous page.
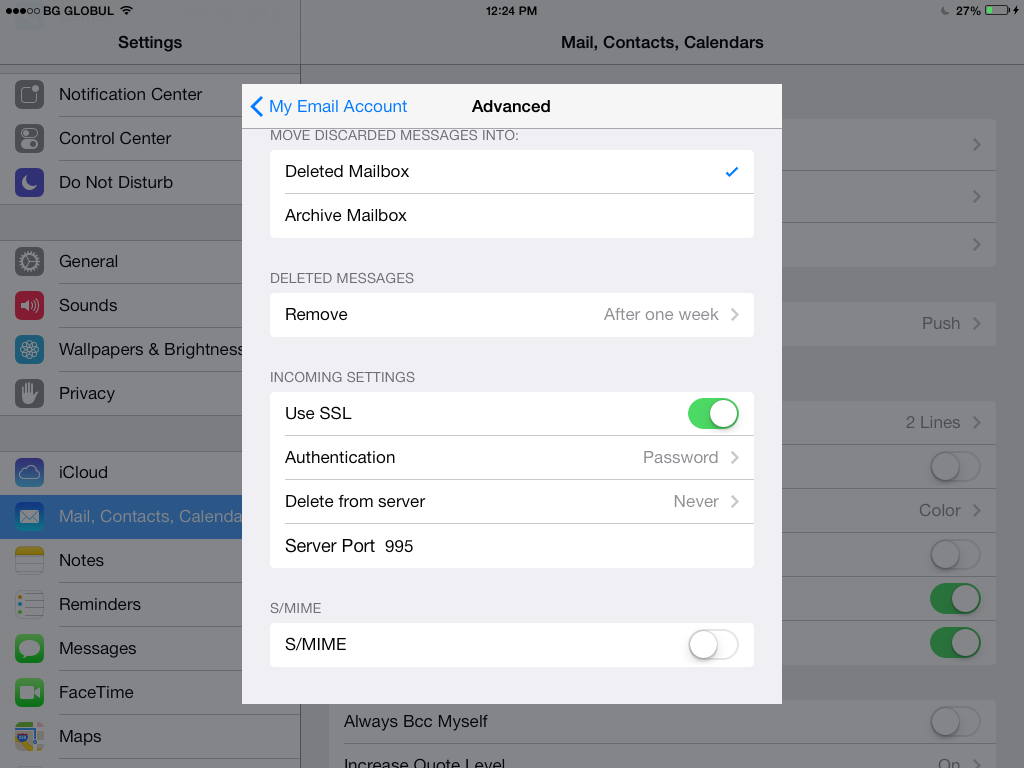
Tap the Done button at the top right corner of the screen.
You can add additional email accounts by repeating the same procedure.