Running a Jenkins instance on Java

This tutorial will show you how to get the Jenkins open source automation server installed on your account. You can find what changes you need to make to your account, how to install Jenkins, and how to force Jenkins to always work over HTTPS.
Note: This guide has been tested with Jenkins version 2.440.1 LTS and Java Development Kit (JDK) version 21.0.2.
Prerequisites
Before you install Jenkins, there are a few settings to check and configure on your hosting account.
- There must be a WebApps section in your hosting Control Panel. If you do not see a WebApps section, then this tutorial is not suitable for your particular hosting environment. You can contact us via our ticketing system for further assistance.
- SSH access and Network tools must be enabled for your account via the hosting Control Panel > SSH Access section.
Installation
To install Jenkins, you will need to connect to your account via SSH and follow the steps listed below.
- Create the directory where you wish to deploy Jenkins (e.g. ~/private/jenkins), and navigate to it by running the following command:
mkdir /home/$USER/private/jenkins && cd /home/$USER/private/jenkins - Download Jenkins for Generic Java package (.war) from its official download page to your account. At the time of writing this article, the latest long-term support version is 2.440.1. The download link of this version is https://get.jenkins.io/war-stable/2.440.1/jenkins.war, so you can download it to your Jenkins folder with the following command:
wget https://get.jenkins.io/war-stable/2.440.1/jenkins.war
Note: Make sure you copy the link of the latest Jenkins version for Generic Java package (.war) and use it in the above command. - The LTS version of Jenkins currently supports Java 21, Java 11, and Java 17 offer full support (reference). You can download the latest Java Development Kit (JDK) version 21 as x64 Compressed Archive for Linux from the official download page. The download link of the latest JDK 21 version at the time of writing this article is https://download.oracle.com/java/21/latest/jdk-21_linux-x64_bin.tar.gz, so you can use the following command to download that version as an archive:
wget https://download.oracle.com/java/21/latest/jdk-21_linux-x64_bin.tar.gz - The downloaded JDK 21 package will be a compressed archive, so you will need to extract it. In the given example, the archive's name is jdk-21_linux-x64_bin.tar.gz. With the following command, you can extract the archive, and remove it after the extraction is complete:
tar zxf jdk-21_linux-x64_bin.tar.gz && rm jdk-21_linux-x64_bin.tar.gz - Next, you should create the Jenkins web application. You can use the sureapp CLI tool to create a web application named "jenkins" by running this command:
sureapp project create \
--engine custom \
--engine-version - \
--release-dir "/home/$USER/private/jenkins" \
jenkins - Log into your new Jenkins project by executing the following sureapp CLI command:
sureapp project shell jenkins - The next step is to configure the start command of the web application. Since Jenkins will run on Java, you will need to locate the java binary inside the JDK folder. For example, the java binary for JDK version 21.0.2 will be located in folder ~/private/jenkins/jdk-21.0.2/bin/java, and the start command for the Jenkins web app can be set with this command:
sureapp project modify --start-cmd "/home/$USER/private/jenkins/jdk-21.0.2/bin/java -Xmx768m -XX:MaxRAM=1024m -jar /home/$USER/private/jenkins/jenkins.war --httpPort=\$PORT --httpsPort=-1" --rlimit-as 2048000000
If you plan to run Jenkins in a subdirectory of your domain/subdomain (e.g. example.com/Jenkins), you should add the "--prefix=Jenkins" networking parameter to the start command of your web application.
Note: If your Jenkins application restarts due to out of memory errors, you can increase the values of the "-Xmx768m" (maximum heap size), "-XX:MaxRAM=1024m" (real memory size used to set maximum heap size) settings in the start command and the "--rlimit-as 2048000000" (memory limit for the web application) setting of the web application. We would recommend that you increase these values according to the memory limits of your specific hosting plan. - Set an environment variable for the web application that defines the Jenkins home directory:
sureapp env set JENKINS_HOME /home/$USER/private/jenkins - Configure the Jenkins URL via the hosting Control Panel > WebApps section by clicking on the Edit button next to the jenkins web application. Select the domain and subdomain where Jenkins will run via the available drop-down menus on the screen that appears. Save the changes.
- Start the web application by clicking on the Enable button.
- Refresh the page until the State changes to OK.
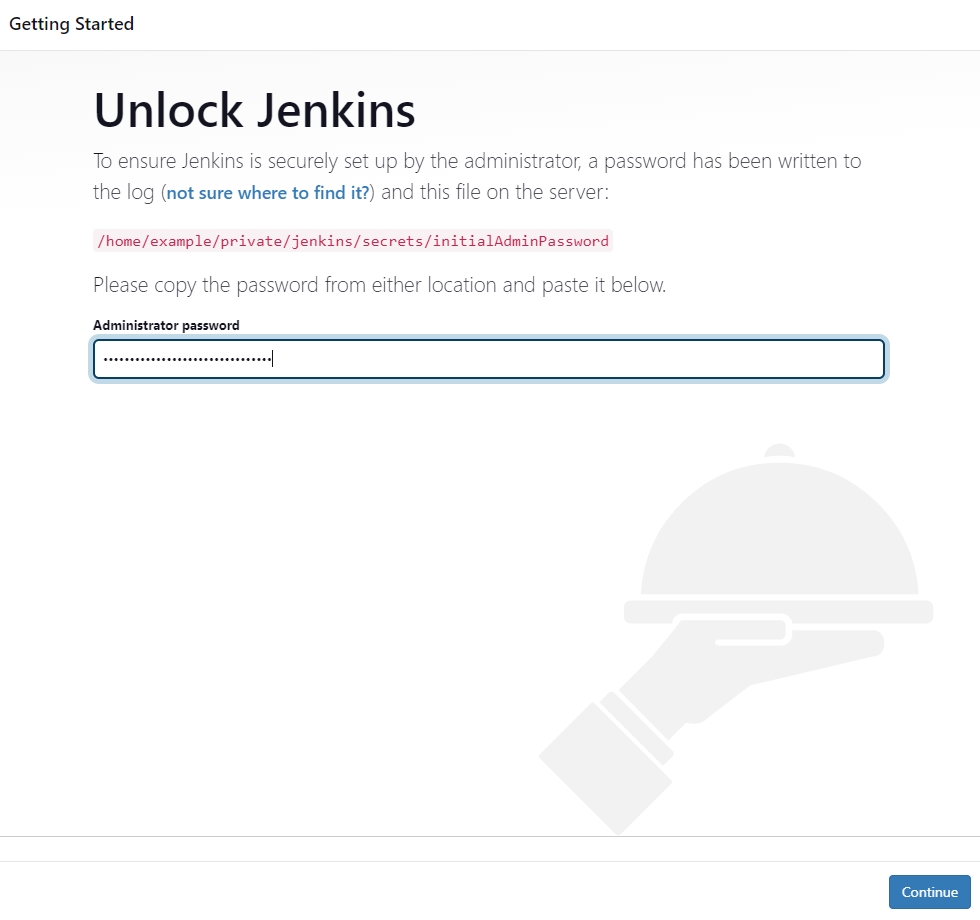
- Open the URL of your Jenkins application (listed under the URL tab for the web application), and you will be presented with the following screen:

- On the Unlock Jenkins screen, you will find information on where to find your initial administrator password - in the ~/private/jenkins/secrets/initialAdminPassword file of your account or in the web application logs. You can get the password from the file with this SSH command:
cat /home/$USER/private/jenkins/secrets/initialAdminPassword
Alternatively, you can view the password with this sureapp CLI command after you are logged into your Jenkins web application:
sureapp log follow
Enter the password, and complete steps in the setup wizard to finish the installation process. - Enjoy your Jenkins application.
Force HTTPS
Jenkins requires users to authenticate with a username and password, so we strongly recommend that you force HTTPS for it. All you need to do is enable or install an SSL certificate on the server for your (sub)domain and click on the Enable button next to your domain or subdomain within the hosting Control Panel > SSL/HTTPS section > Force HTTPS subsection.